Introduction
Plastic packaging is everywhere — from snack bags and frozen food to toiletries and craft supplies. But once you open that bag, how do you keep the contents fresh, organized, and spill‑free? Learning how to reseal plastic packaging not only reduces waste but also saves you time and money. In this detailed guide, we’ll walk through proven methods, the tools you need, and smart tips for everyday use.
Whether you’re managing snacks for family, organizing small parts, or protecting products for shipping, mastering resealing techniques can make life easier. Let’s dive in.
Why Resealing Plastic Packaging Matters
Most of us don’t think twice before tossing an open bag into the pantry, but leaving plastic packaging open has real consequences:
- Food goes stale quickly – Exposure to air causes crackers, chips, and cereals to lose crunch.
- Moisture and pests can invade – Open bags are inviting to bugs and humidity.
- Mess and spills – Unsealed packaging can create chaos in drawers, bags, or freezers.
- Wasted space – Open packaging often takes up more room than resealed packets.
By learning how to reseal plastic packaging, you can keep food fresher longer, protect small items, and maintain a tidy home.
Tools You Can Use to Reseal Plastic Packaging
Before we explore sealing methods, let’s look at tools that make the job easier:
Simple Everyday Tools
- Chip clips or bag clips – Cheap and effective for snack bags.
- Rubber bands – Flexible option for temporary closure.
- Twist ties – Often included in bread bags.
- Clothespins – Double as strong bag seals.
Purpose‑Built Resealing Tools
- Heat sealers – Create airtight seals using heat (great for food storage).
- Vacuum sealers – Remove air and seal for extended freshness.
- Impulse sealers – Provide a stronger seal for thicker plastic.
Step‑By‑Step: How to Reseal Plastic Packaging
Now that you know the tools, here’s how to reseal plastic packaging depending on the material and your goals.
Heat Sealing at Home
Heat sealing is one of the most reliable ways to close plastic packaging, especially for food.
What You Need
- A heat sealer or an iron
- A flat, heat‑resistant surface
- Your open plastic bag
The Process
- Flatten the opening – Make sure the bag’s edge is straight and even.
- Set your heat source – If using an iron, set it to a low to medium heat without steam.
- Seal the bag:
- With a heat sealer: Place the edge into the machine and press according to instructions.
- With an iron: Lay a towel over the bag edge and press the iron lightly along the opening.
- Allow to cool – A strong seal forms as the plastic cools.
Heat sealing works great on thicker plastics and is especially useful for bulk foods, camping snacks, or homemade items you want to store long‑term.
Using a Vacuum Sealer for Maximum Freshness
A vacuum sealer is ideal for food items you plan to store for weeks or months.
Why Use a Vacuum Sealer?
- Removes air that causes spoilage
- Creates airtight seals
- Great for meats, coffee, and more
Steps to Vacuum Seal
- Insert food in bag – Leave enough space at the top for sealing.
- Place in vacuum chamber or machine track.
- Start the vacuum cycle.
- Let the machine seal – It will press and heat‑seal automatically.
This method is excellent for freezer meals and large‑batch storage.
Quick Methods for Everyday Packaging
Not all situations need tools. Here are easy everyday hacks:
Clip and Fold
- Fold over the top of the bag about 1 inch.
- Use a clip to secure the fold.
Ideal for chips, candies, and cereals when you’ll use them soon.
Twist and Tie
- Twist the open end of the plastic bag.
- Secure with a twist tie or rubber band.
This approach works well for bread bags and produce bags.
Create a DIY Zipper
If your packaging doesn’t have a zipper, you can make one:
- Fold the top edges together.
- Press tightly with your fingers to create a makeshift seal.
- Add a clothespin or binder clip for reinforcement.
Advanced Techniques for Specialized Packaging
Different products require different resealing approaches. Let’s look at specific categories.
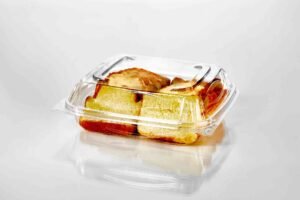
Resealing Food Packaging
Food is one of the most common reasons to reseal plastic packaging.
Tips for Food Sealing
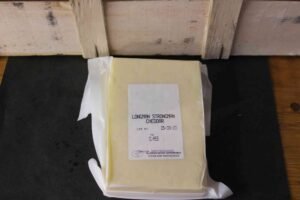
- Label and date food before storing to track freshness.
- Avoid contact between oil/moisture and resealing surface.
- For powders or fragile contents, consider double bagging to prevent spills.
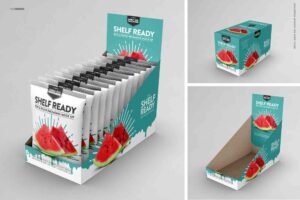
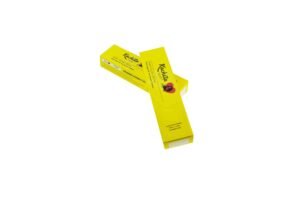
This same attention to detail applies when selecting custom packaging solutions. For example, businesses may choose high‑quality boxes for retail items like beard oil boxes that seamlessly protect and present products. Similarly, investing in well‑designed custom food boxes can reduce waste and improve product freshness during storage and shipping.
Resealing Non‑Food Plastic Packaging
Plastic packaging isn’t only for food — it’s everywhere:
- Hardware and craft supplies – small parts, beads, screws
- Electronic accessories – cables, small components
- Household items – replacement parts, seasonal decorations
Best Practices
- Use small zip or heat seal bags to organize and reseal parts.
- Store open packages in labeled bins or drawers for quick access.
- For delicate items, add bubble wrap or padding inside the bag before sealing.
Common Mistakes to Avoid When Resealing
Even with the right tools, people often make mistakes. Here’s how to avoid them:
Applying Too Much Heat
Heat sealers work well, but excessive heat can melt or warp plastic. Start on a low setting and test on scrap plastic.
Ignoring Air Removal
Air is the enemy of freshness. When possible, squeeze out excess air before sealing or use a vacuum sealer.
Using Weak Clips for Long‑Term Storage
Simple clips are great for short‑term use, but they won’t keep air and moisture out for months. Switch to a heat or vacuum seal for long stays.
Eco‑Friendly Tips for Plastic Packaging
While plastic is convenient, environmental concerns are real. Here’s how to be more eco‑aware:
Reuse When Possible
Resealing extends the life of plastic packaging, reducing how often you buy replacements.
Recycle Correctly
Check local recycling rules — not all plastics go in the same bin. Rinse and flatten before recycling.
Choose Reusable Bags
For pantry items, consider using reusable silicone or zip bags that can be sealed and washed again.
Master the Art of Resealing
Knowing how to reseal plastic packaging is more than a household trick — it’s a skill that helps you save food, reduce waste, and stay organized. From simple clips to heat and vacuum sealers, there’s a method for every need and budget. With practice, you’ll cut down on stale snacks, lost screws, and messy drawers.
Whether you’re organizing your pantry or running a small business, the right sealing approach makes life easier. Want quality packaging for your products? Explore options like beard oil boxes and custom food boxes to elevate your storage and presentation.
FAQs
How do you reseal plastic packaging without a sealer?
You can fold the open edge, then use clips, twist ties, or rubber bands to keep the bag closed. For better results, combine folding with a tight clip.
Is it safe to heat seal plastic food bags?
Yes, if the plastic is designed for heating and you use a proper heat sealer or iron with low heat. Always follow product instructions and avoid melting the bag.
Can plastic packaging be resealed permanently?
With heat and vacuum sealers, you can create a near‑permanent airtight seal. For regular clips, the seal is temporary and best for short‑term storage.
What’s the best tool for resealing food bags?
For long‑term freshness, a vacuum sealer is best. For everyday snacks, simple clips and twist ties do the job well.
Looking for reliable and eco-friendly packaging solutions? Buddy Packaging Co offers high-quality, customizable packaging that fits every business need. From sustainable materials to innovative designs, they make sure your products stand out while staying environmentally conscious. Explore their full range of services at Buddy Packaging Co today!